Pusher based Instant Messaging
Useful System Development Tools
- PHP 5.3, Zend Server 6, Zend Studio, Zend Guard
- Firefox with Firebug extension
- Pusher.com account

Further Info / Support
If you have further questions, suggestions or Zend Serverenquiries please contact Chittak via:
01202 611 711, www.chittak.co.uk, support@chittak.co.uk
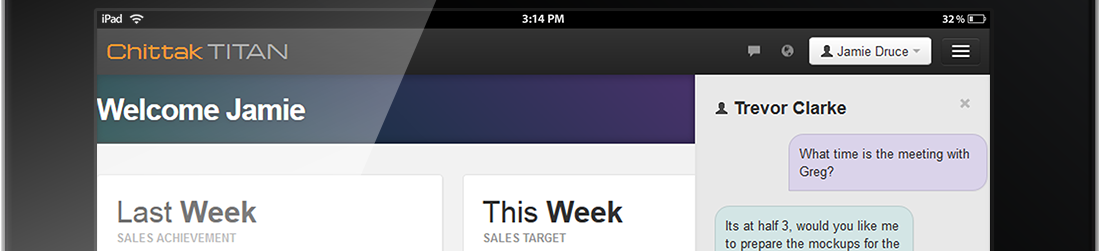
After a great deal of initial research into how to implement instant push notifications in our new TITAN CRM system (www.titansalescrm.com), it quickly became clear that a custom solution with appropriate fallbacks would be a lot of work to implement. That’s when I became a fan of Pusher. Getting the notification system up and running was pain-free and quick; it’s when I decided to implement a chat system that some thought and planning was needed.
It appears at first that Pusher provided a great working example, but this is only a one way limited approach. I needed a completely custom design which allows a user to talk to anyone else logged into the system.
Hunting around the Pusher forums turns up a lot of people asking for a similar example, with the owner Phil Leggetter offering up advice on the general approach - but also admitting that this topic needs a proper tutorial written for it.
SO, WE THOUGHT WE SHOULD WRITE A CHITTAK TUTORIAL FOR MULTI CHANNEL INSTANT MESSAGING USING PUSHER.COM
The Objective:
To enable secure instant internal communication between staff users on a business CRM application the staff use to manage company relationships with the clients and customers.
The Solution:
So the general approach goes like this:
- Use a general presence channel with a subscribe event handler to display which users are currently online
- Each time someone subscribes to this primary channel, a private channel should be set up between that user and every other user online
- When selecting a user, the unique channel should be used, allowing communication between any two users
The first step is part of standard Pusher usage, and is well documented over on their site, it’s the second step that provides some complexity. The following naming convention was used to set up channels for each user pair: private-chat-{lowest user id}-{highest user id}
There are a few important things to note here. The first is the use of private channels, this ensures communication is kept private and secure. The second is the ordering of IDs. On first glance it is tempting to put user1-user2, but this would lead to two channels per user pair; user1-user2 and user2-user1, as a channel needs to be set up from both ends.
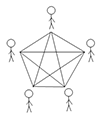
So using the current user's session ID, and each logged in user's user ID from the initial presence channel, a quick ordering of the IDs allows you to set up a private communication channel between each user, this creates a massive interconnected web of connections to enable rapid chat within the use case of an internal call center.
If you were applying this to a ‘Live Chat’ situation then this would generate unnecessary overhead, you would instead set the channels up on a reactive basis to avoid lazy channeling for the functional need.
    var userid = /* set current users userid */
    var chatchannels = new Array();

    $(document).ready(function(){
        channel.bind('pusher:subscription_succeeded', function(members) {
            members.each(function(member){
              add_member(member.id, member.info);
            });
        });
    });

    function add_member(id, info)
    {
        // set-up private connection for each person on the system, lowest id first
        if(id < userid){
            var varname = id +'-'+ userid;
        } else{
            var varname = userid +'-'+ id;
        }

        chatchannels[varname] = pusher.subscribe('private-chat-'+ varname);
        chatchannels[varname].bind('new_message', function(response) {displayMessage(response, id);});
    }
In the above example I store each channel in an array with the unique ID pair as the key, this allows me to quickly choose a channel when needed .
It is also worth pointing out that an ‘on unsubscribe’ function should be created to unsubscribe from these channel, ensuring efficient code and avoiding duplicate channels.
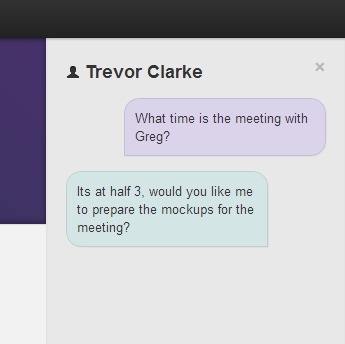
You can breathe a light sigh of relief as the hardest part is over! Communication is then a case of handling incoming and outgoing events as explained in the general Pusher documentation. We would recommend that all outgoing messages are sent through a server side script which can save it to the database and then trigger the pusher event. This allows a log of previous chats to be loaded when users navigate around the site.
    $key = /* your pusher key */;
    $secret = /* your pusher secret */;
    $app_id = /* your pusher app id */;

    $pusher = new Pusher($key, $secret, $app_id);
    date_default_timezone_set('Europe/London');

    $name = $_SESSION['firstname'];
    $message = $_POST['message'];
    $socketID = $_POST['socketID'];
    $userID = $_POST['id'];

    if($userID < $_SESSION['userid']){
        $channel = 'private-chat-'.$userID.'-'.$_SESSION['userid'];
    } else{
        $channel = 'private-chat-'.$_SESSION['userid'].'-'.$userID;
    }

    // add message to database
    $dbadd = addMessage($db->connection, $userID, $message);

    // trigger pusher message
    $response = $pusher->trigger($channel, 'new_message', array('message' => $message), $socketID);

    header('Cache-Control: no-cache, must-revalidate');
    header('Content-type: application/json');

    $result = array('message' => $message, 'success' => true, 'channel' => $channel);
    echo(json_encode($result));
Other advanced features I added that you may want to consider using are:
- Chat window persistence – when users start a chat I use a small Ajax call to set a PHP session, this means that if a user is navigating around the site while chatting, the chat window will re-open automatically.
- Marking messages as ‘seen’ – when a user clicks the chat window or opens a closed chat window, a hidden Ajax request is sent. The script presumes that this level of interaction means the user has seen the message, this can then be used to inform the other user and to hide any active ‘new message’ notifications.
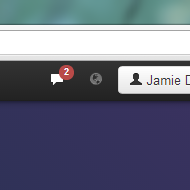
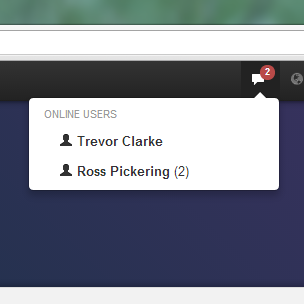
- Title and navigational notifications – when a message comes in, the chat icon in our navigation lights up and a little badge displays how many messages are unseen. The title of the page is also updated in case the user has the browser minimised
- See whos online – see a list of who is online, that way you can easily start convesations!
Further Info / Support
If you have further questions, suggestions or Zend Server enquiries please contact Chittak via:01202 611 711, www.chittak.co.uk, support@chittak.co.uk
Thanks for reading!
The team at Chittak

